viewneo RFID Installation Manual
RFID Gateway Setup
- Connect the gateway to the power supply.
- Log in to your viewneo account at https://cloud.viewneo.com/
- Switch to the Devices - RFID Gateway section
- Start the setup via the + symbol
- Assign a name for the gateway
- Now an activation code is displayed.
- Search for a WLAN HotSpot viewneo-RFIDXXXX with a WLAN-capable mobile device (smartphone) and connect to it.
- Select a WLAN network in the following input mask and use a valid password. In addition, enter the Activation Code in the input field provided.
If the connection is successful, the RFID gateway is now displayed as Connected in the list.
RFID Reader Connection
- Connect the readers to each other using an Ethernet cable. The order of the two Ethernet ports on the device does not matter.
- Slide the switch below the LED of the last reader to the left (see picture).
- Also slide the switch below the LED on the gateway to the left.
- Connect the first reader to the gateway via Ethernet cable.
Make sure that at the first and last device in the row the switch below the LED is set inwards (towards the Ethernet port). All others must be switched in the opposite direction. The first device is usually the gateway (Terminate=ON) and the last is an RFIF reader (Terminate=N), all devices (RFID readers) in between must be set to Terminate=OFF.
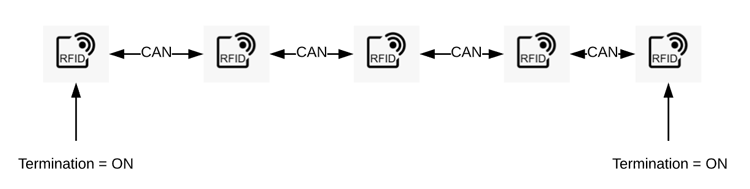
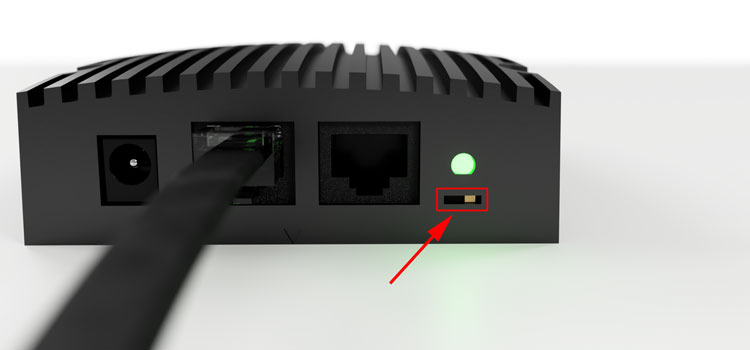
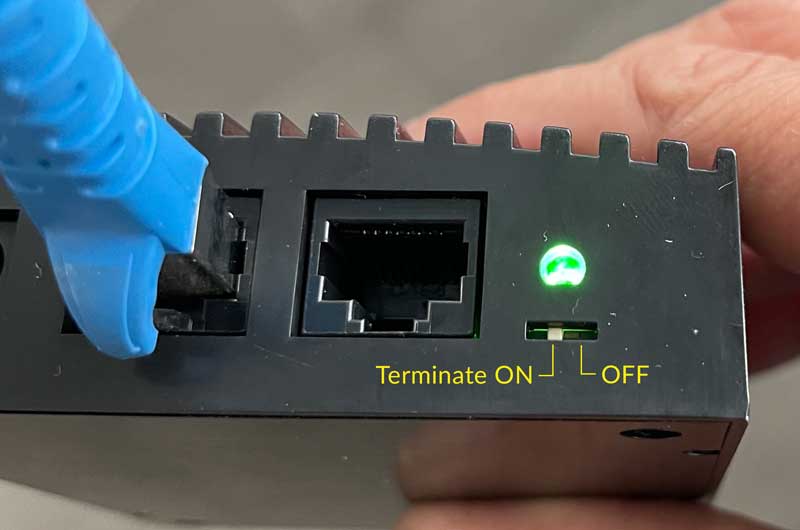 Figure: This switch must be pushed left at the first and last device in the line (bus). All other devices in between must have the switches pushed to the right.
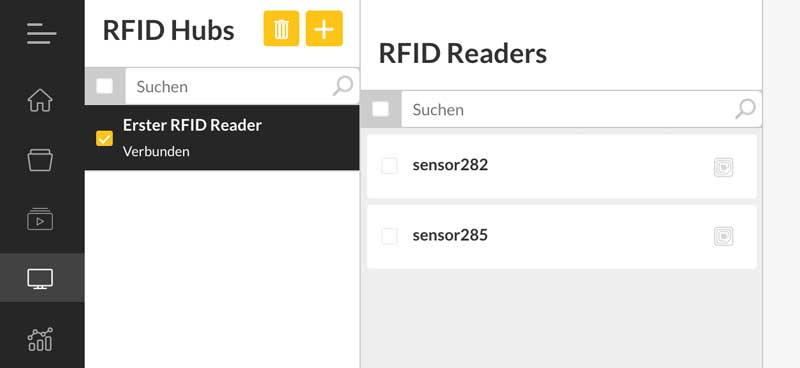 Figure: The switch for defining the start or end of the bus line must be set to on at the first and last device (terminated=on).
- The gateway now searches independently for the connected devices. This can be seen by the changing colors of the LEDs (red, blue, green) on the readers. If all LEDs of the readers are green, then the readers are displayed in the CMS a little later.
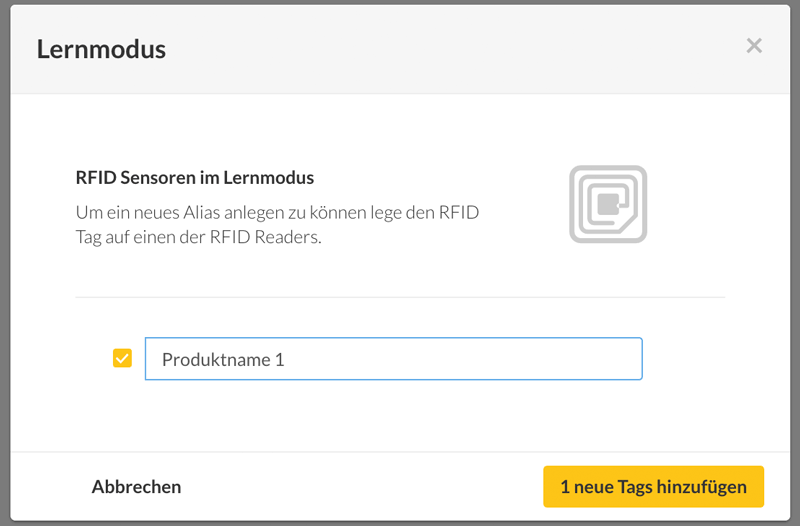
Teach RFID tag
In order for a specific action to be performed on a specific RFID tag, i.e. when a product equipped with an RFID tag (sticker) is held over a reader (RFID Reader), the ID of the corresponding RFID tag must be read.
To do this, proceed as follows:
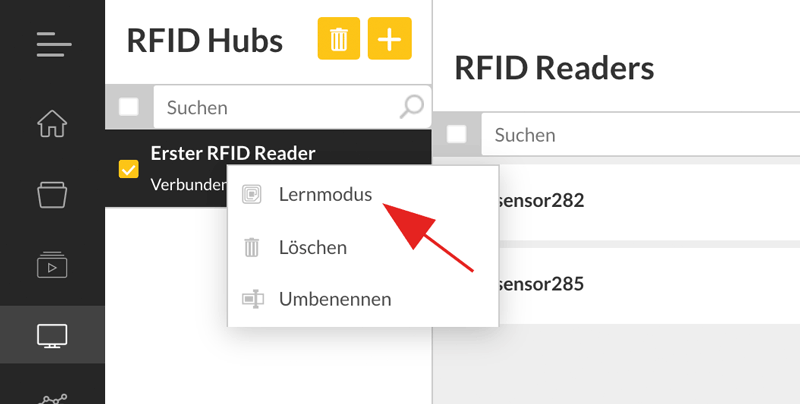
- Right-click on the Gateway to open the submenu and select Learning Mode
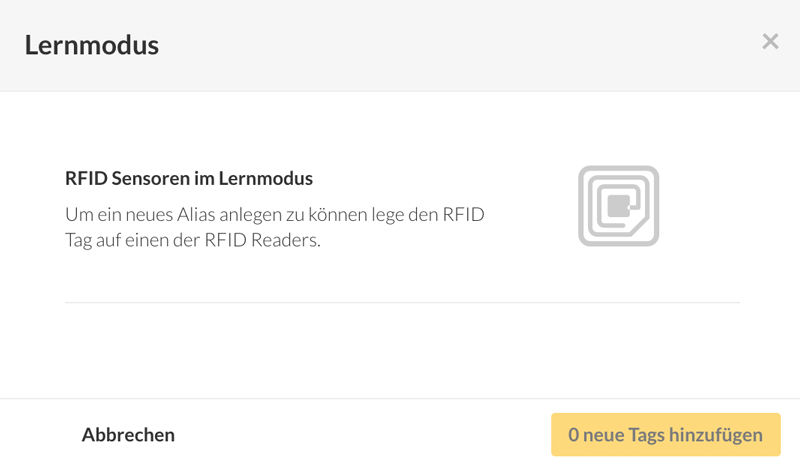
- Now the desired RFID tag (sticker or card) must be placed on one of the connected readers.

If the recognition is successful, the individual ID of the RFID chip is read out and displayed.
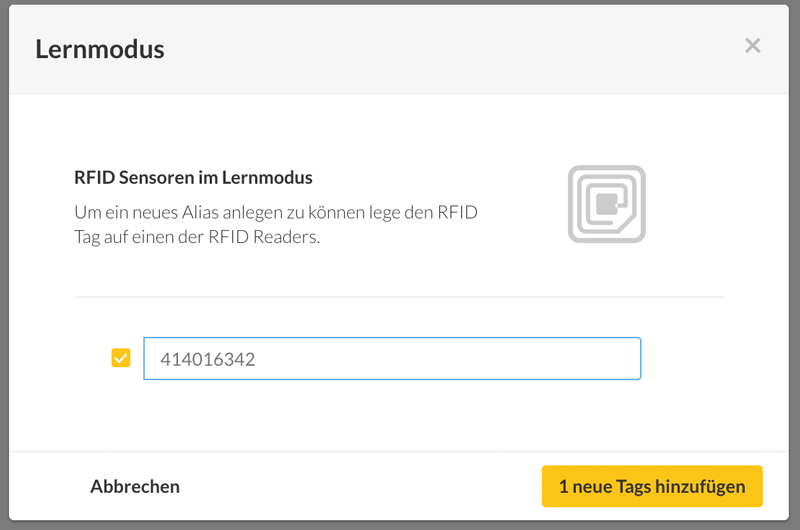
- Now you can assign an individual alias. This could be, for example, the product name of the product that will later receive this RFID sticker. This name is later used to define the actions in the event management that should happen when the RFID reader detects this tag.
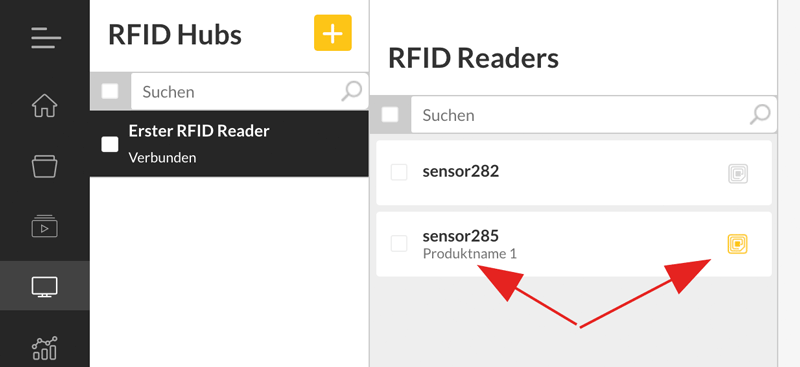
Check function
You can later place the read tags on any reader. If these are correctly recorded, then this is recognized in the CMS in the list of readers by a yellow colored RFID tag symbol and below the reader name is the previously assigned alias name for the read RFID tag.