viewneo Docs | Content Management | EN
Getting started in viewneo
Now the work begins in the viewneo Content Management System. The following will outline step by step how the Hotel TV concept can be set up in viewneo. The first step is to set up the devices. You can install the players and monitors in the hotel and then complete the setup process on site.
Setting up the devices (DS-Player and touch displays)
First, power on your devices. The DS-Player (viewneo 4K SignageBox) must be connected to a monitor. The touch displays only require that you turn them on.
Connecting and starting the player
Detailed instructions on how to set up a viewneo 4K SignageBox can be found here: Installation viewneo 4K SignageBox
Please note that the Philips 10” razor display can be set up in the same way as the viewneo 4K SignageBoxes.
As soon as the viewneo devices are connected to the network, the following start screen will be displayed:
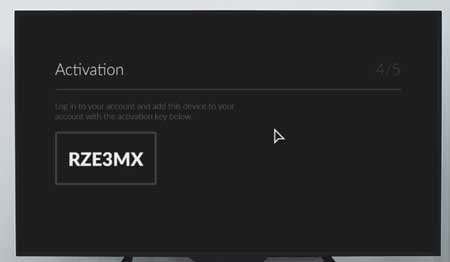
Since a new device is not automatically connected with your viewneo user account, the code which is displayed needs to be added to the individual user account. This lets viewneo associate the device with an individual user account.
Linking a device with a user account
Login to viewneo
The first step is to log in to viewneo to get up your own user account. Once this is done, you can click on Devices located on the left-hand side of the screen.

Device Groups
In order to assist with managing content, the various players are placed into groups. So prior to adding a new device, you will first need to create a new device group. Using device groups will assist you in managing and controlling content more effectively. For example, turning monitors on and off, or switching from one playlist to another, will only need to performed once, when a device group has been correctly set up. Additionally, all devices which are in a device group are automatically assigned any newly created playlists.
The properties that you define for a device group are inherited by all devices that are in that group. Therefore, it is highly recommended to organize devices (DS players) in groups..
Given that in this example, different locations throughout the hotel have different content, we will want to use the following device groups for the Hotel TV:
- Lobby
- Bar counter
- Bar ambience
- Elevator inside
- Elevator outside
- Room Displays
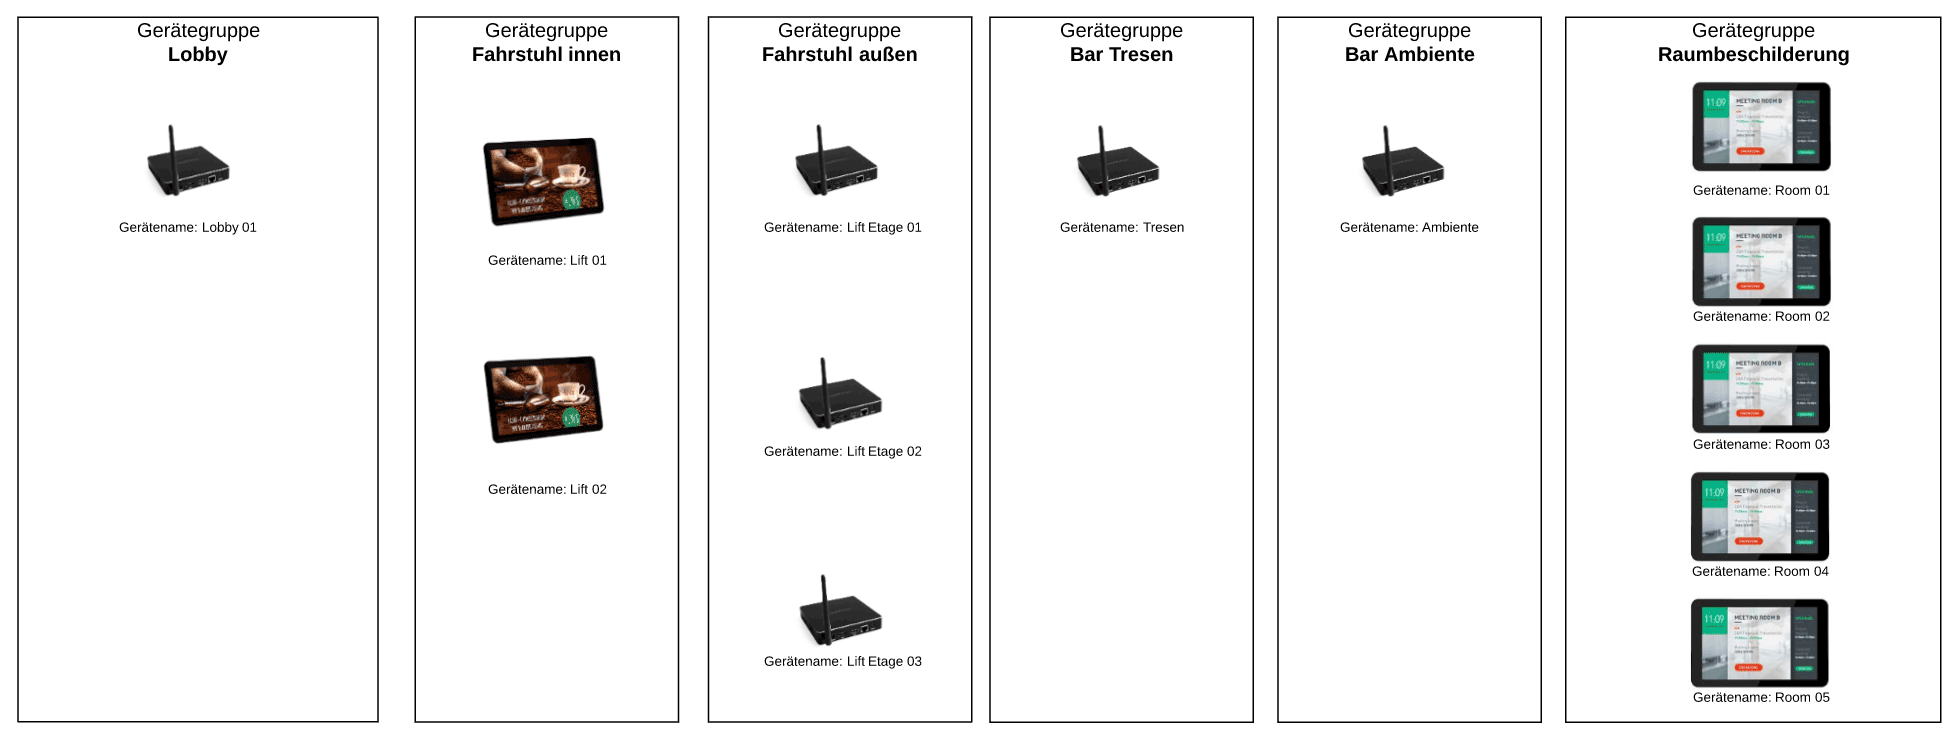
Special feature for room signage: Although later the room signage will show different content, it’s helpful to organize these displays into a group at this stage. Later we will show how to display individual content on devices which are located in the same device group..
Create new group in viewneo
To add a new device group, just click on the plus sign.
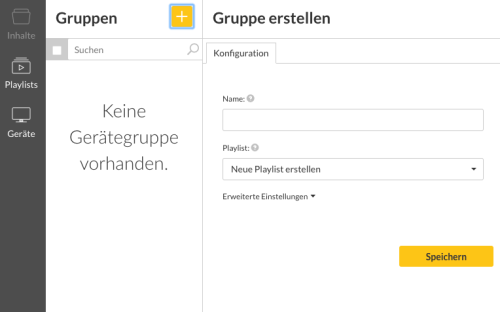

At this stage, we only need to give the new device group a name and click save. All of the other settings can remain on the default settings.
Additional information about the Advanced Settings can be found here.
When creating the new device groups, a new playlist was automatically created for each group since the default options were used when we saved the new group.  At this point, of course, the new device group could be assigned to an already existing playlist. But in our example, we will use the default settings, so that every time we create a new group, a new playlist is also created.
Add a player to a group
Once a new device group has been created, then the first player can added to the group.
Since the first device group we created is the Lobby group, we now create the first device in this group.
At this point, the activation code which was displayed on the screen when the device was started is needed.
 It is important to ensure that the activation code is the one that will be used as the media player in the lobby.
Once the Lobby group has been selected, click on the plus sign located under Devices (the plus sign on the right side):
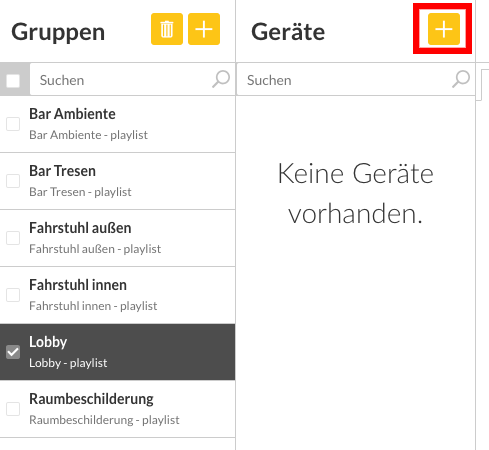
Now a new window will open that allows you to add a new device:
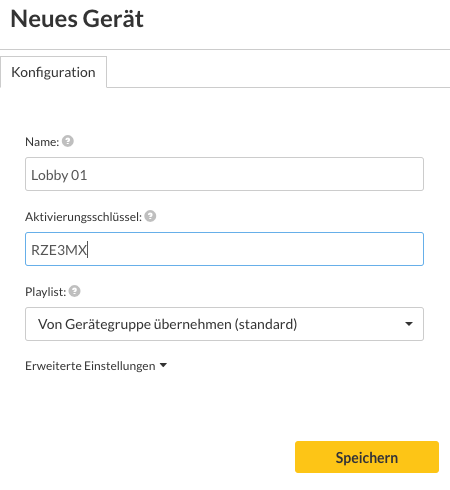
Here, the name can be assigned - in our case, Lobby 01 - and the activation code, which was displayed on the screen, can be entered to allow to connect the player.
At this stage, we only need to enter a name and click save. We can leave the rest of the settings on default. Additional information about the meaning of the Advanced Settings can be found here.
We can follow this same procedure for all of the other players, so that the result is that we have created all devices with their corresponding names.
Now we have all of the devices and have organized them in groups. The groups are already connected to their own playlists. However, these playlists are empty.
Therefore, in the next chapter we will show how content can be created for the empty playlists.