Sub-account Administration
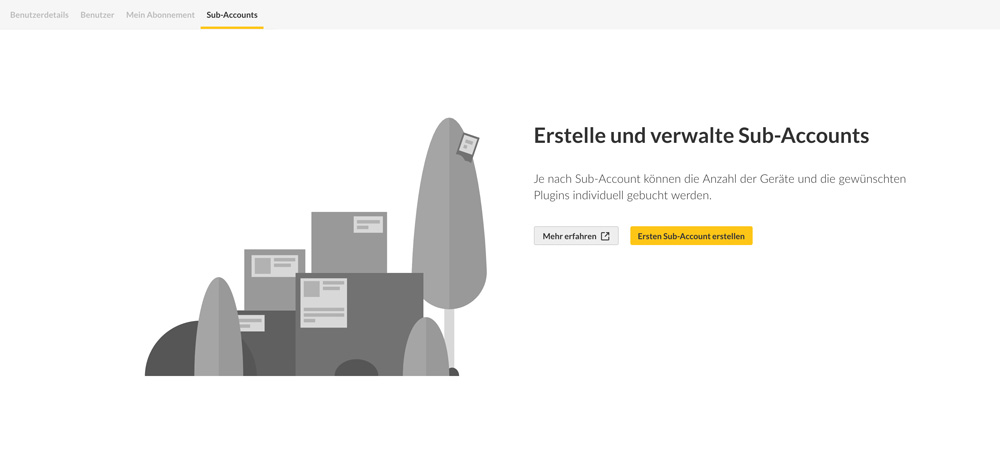
In sub-account management, you have the option to create, edit or remove new sub-accounts associated with your Enterprise account. Additionally, you will be able to see an overview of all of your sub-accounts including the costs associated with them. To get to the sub-account administration, first go into settings (by clicking on the gear icon located in the left panel) of your viewneo account and then selecting the tab "Sub-Accounts".
Create a new sub-account (test phase)
To create a new sub-account, click on the button "Create first Sub-Account".
 When you click on the button, a pop-up window will appear that will guide you through the five steps needed to create a sub-account.
1. Settings
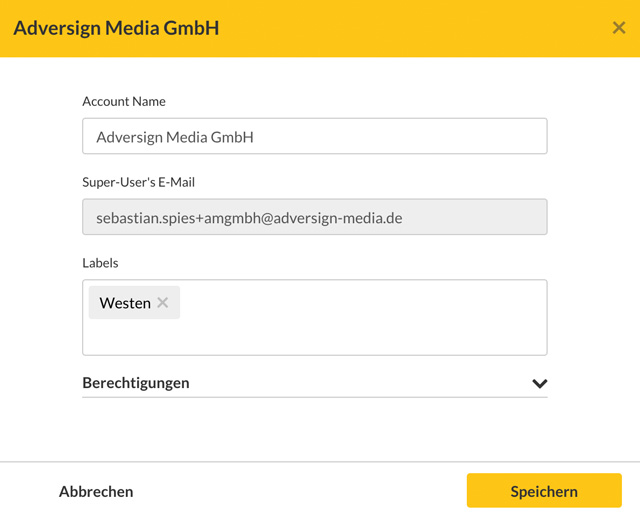
The first step is to define the basic settings associated with the sub-account. These include the name (e.g., Adversign Media GmbH) and the email address of the superuser.
You also have the option of assigning labels to a sub-account, so that you can better organize your sub-accounts. Additionally, you can limit the permissions, for example the ability to upload content, associated with the sub-account. After you have adjusted the settings, click on "Next".
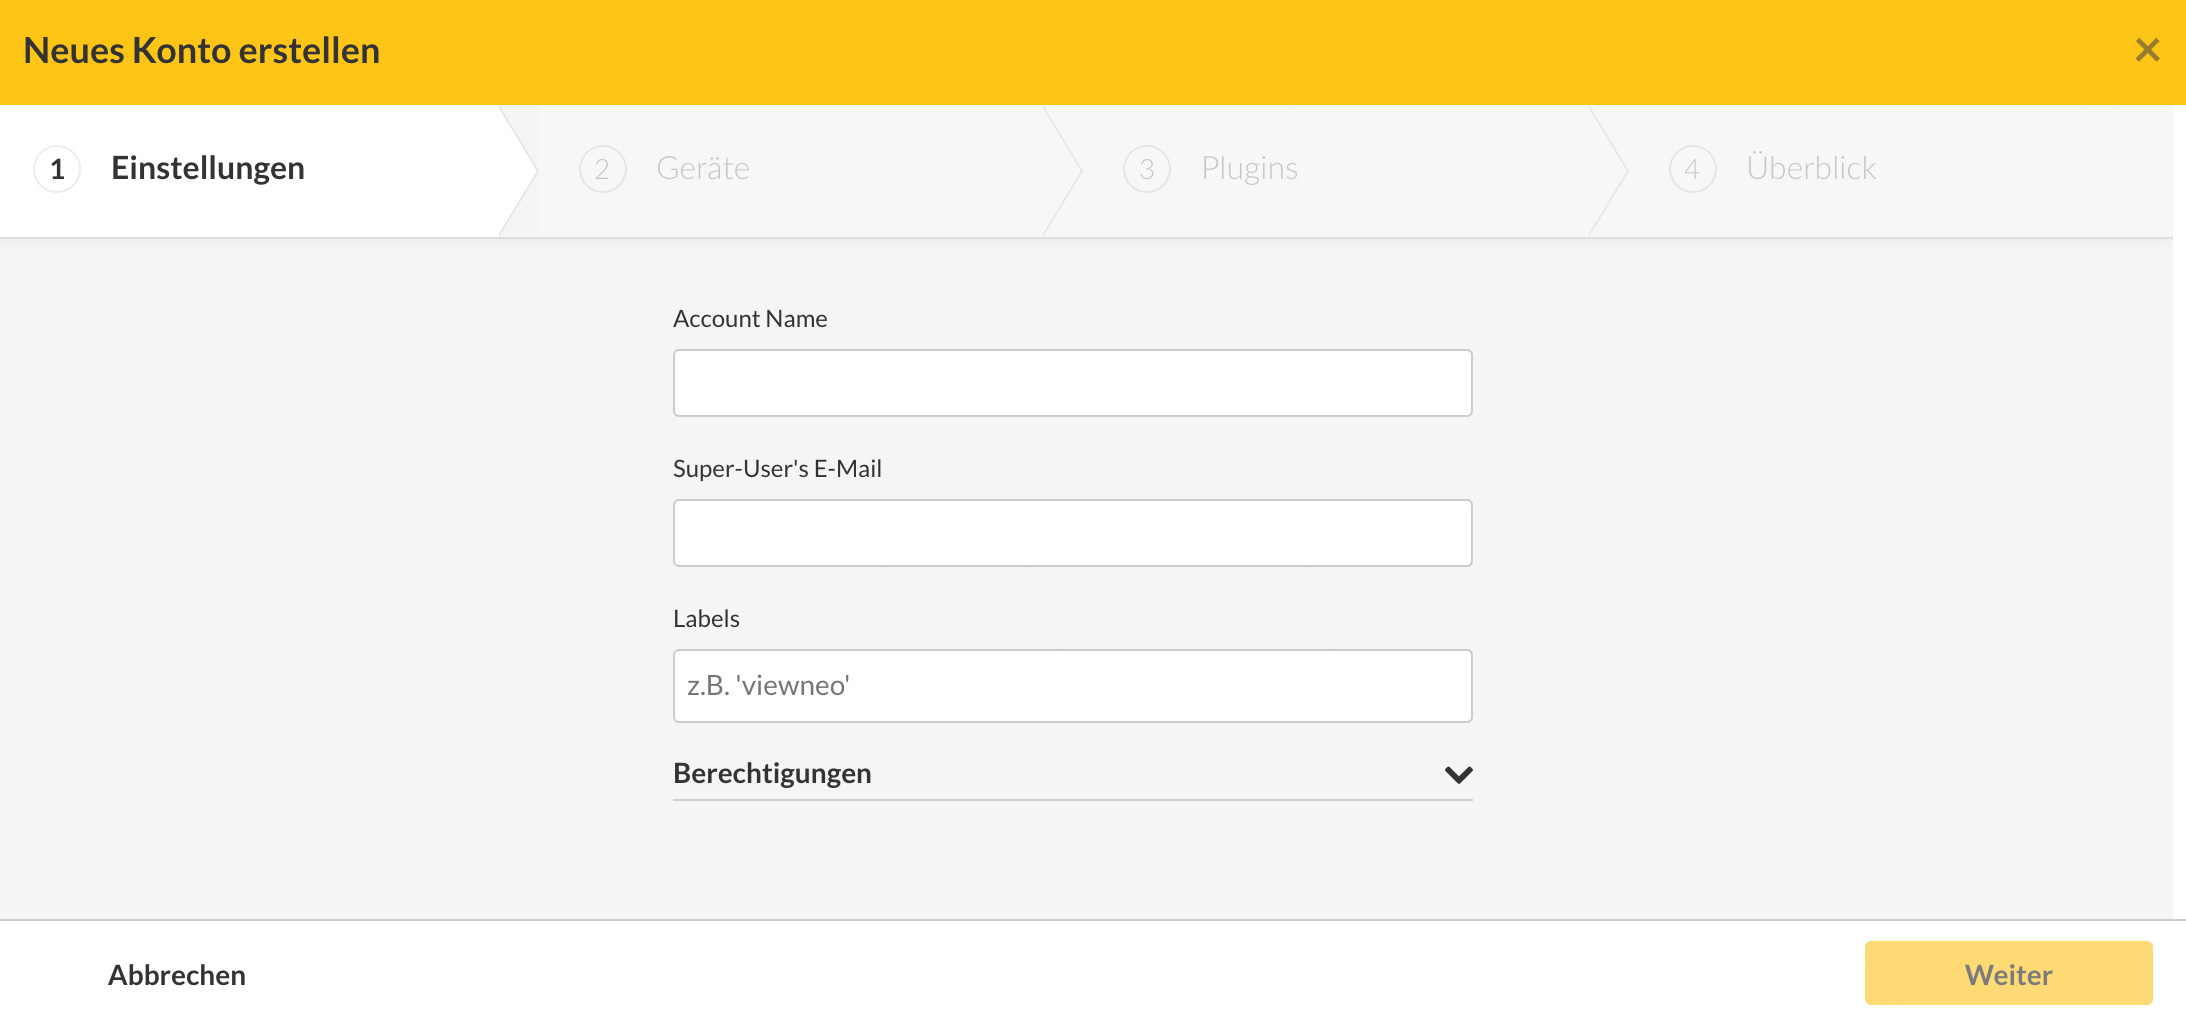
Note that when the settings of a sub-account are changed, an e-mail will be sent to the e-mail of the superuser, who must confirm the change.
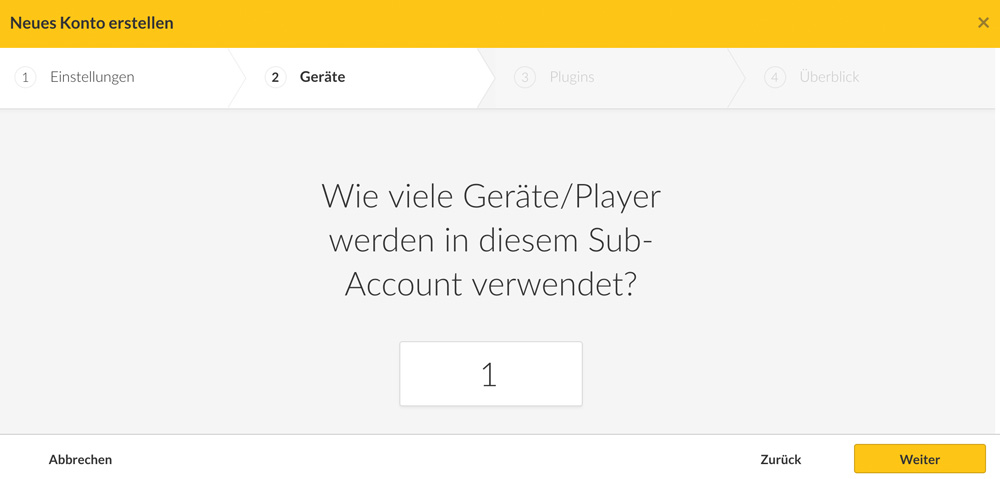
2. Device Licenses
The second step is to select the number of device licenses associated with the sub-account. You can change this selection in the future if your needs change. After defining the number of licenses needed, click on "Next".
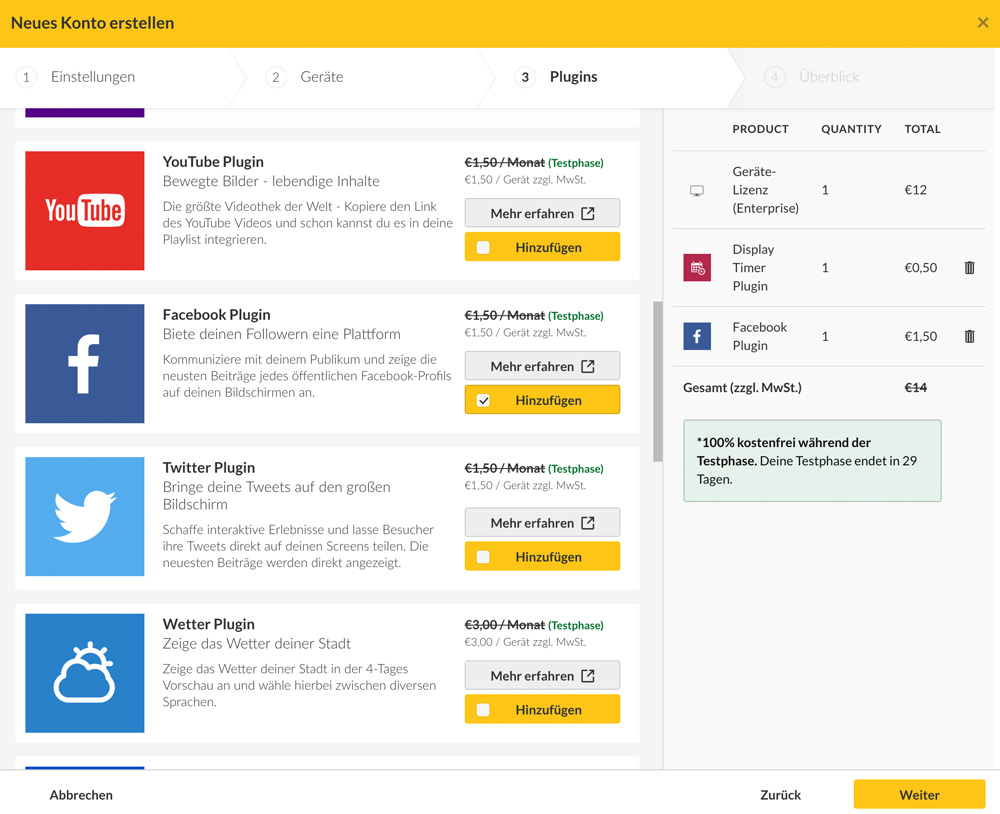
3. Plugins
The third step allows you select the Plugins that you would like to be activated for the sub-account. Similiar to the number of device licenses, this selection can also be changed in the future, if needed. After you have selected all Plugins, click on "Next".
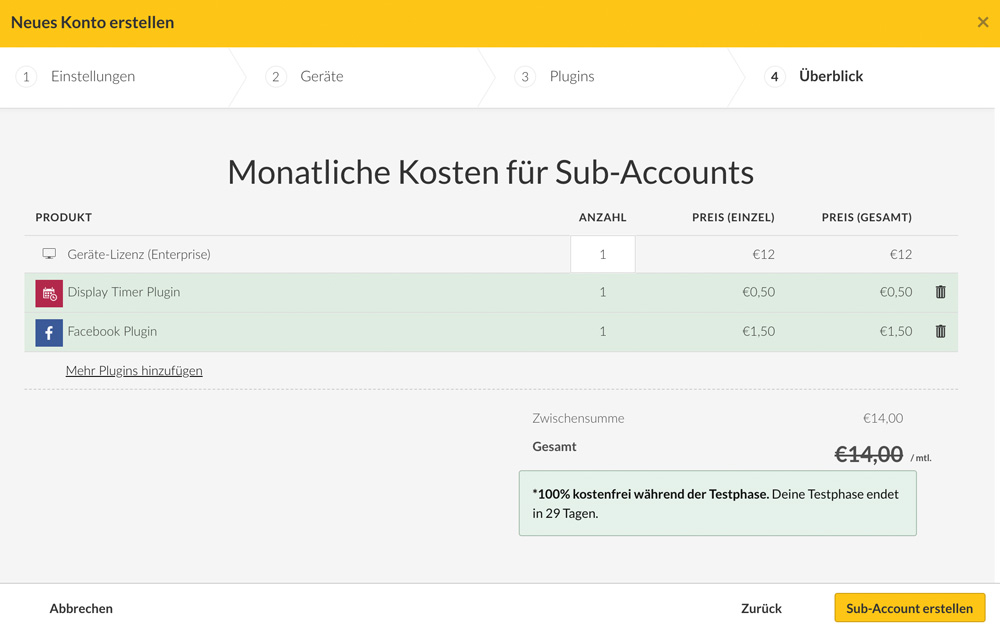
4. Overview
In the last step, you will see a summary of the costs associated with your new sub-account. You also have the option to change the number of device licenses and the selected Plugins again. After clicking on the "Create Sub-Account" button, the new sub-account will be created and the cost of the sub-account will be added to your monthly bill.
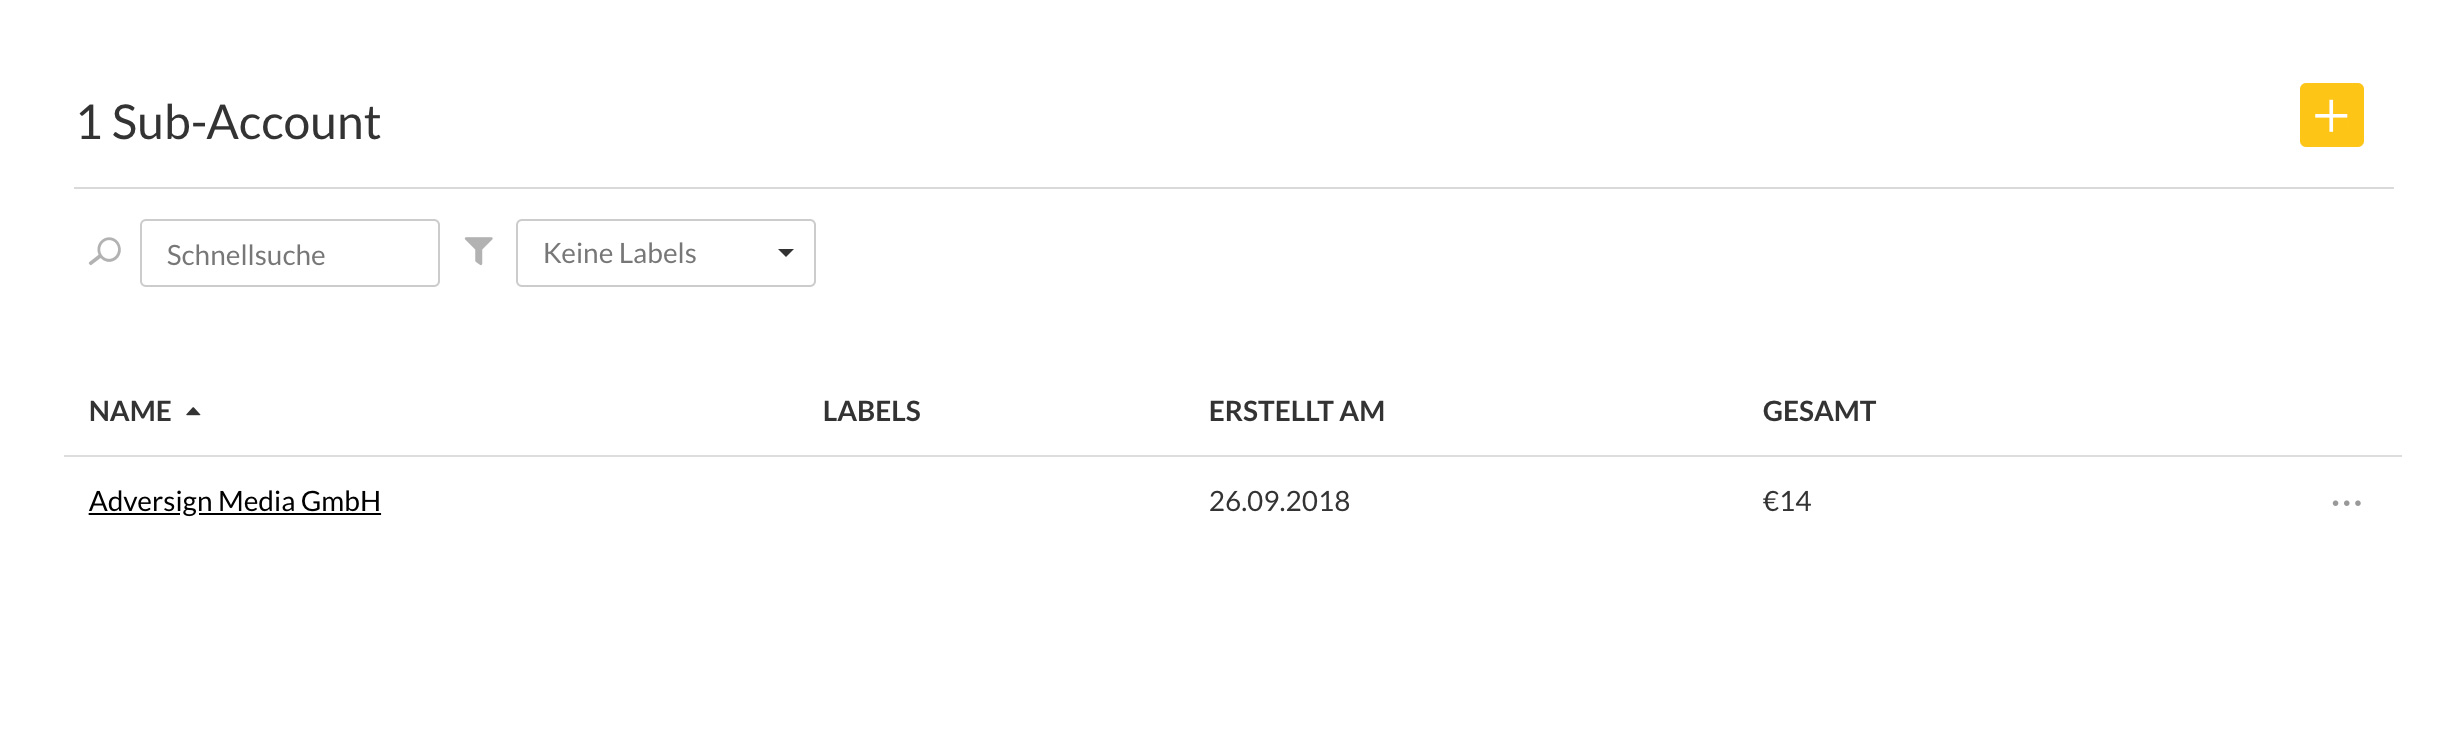
You will now be able to see the new account in the sub-account management section and make any changes to it, if necessary.
Note: If you don't a paid subscription, you can only add one sub-account. Once you have completed and paid for a subscription for the viewneo Enterprise solution, you will be able to create an unlimited number of sub-accounts.
Create a new sub-account (outside of test phase)
To create a new sub-account, click on the "+" button located on the right-hand side of the screen or, if you have not yet added a sub-account, click on the "Create first Sub-Account" button. After you have pressed one of the two buttons, a pop-up window appears which will guide you through the five-step process of creating a sub-accout.
1.Settings
The first step is to define the basic settings associated with the sub-account. These include the name (e.g., Adversign Media GmbH) and the email address of the superuser. You also have the option of assigning labels to a sub-account, so that you can better organize your sub-accounts. Additionally, you can limit the permissions, for example the ability to upload content, associated with the sub-account. After you have adjusted the settings, click on "Next".
An e-mail will be sent to the superuser e-mail address, which must be confirmed in order for the changes to be processed.
2. Device Licenses
The second step is to select the number of device licenses associated with the sub-account. You can change this selection in the future if your needs change. After defining the number of licenses needed, click on "Next".
3. Plugins
The third step allows you select the Plugins that you would like to be activated for the sub-account. Similiar to the number of device licenses, this selection can also be changed in the future, if needed. After you have selected all Plugins, click on "Next".
4. Overview
In the last step, you will see the cost summary of your new sub-account. You also have the option to change the number of device licenses and the Plugins again. After clicking on the "Create Sub-Account" button, the new sub-account will be created and the cost of the sub-account will be added to your monthly bill.
You will now be able to see your new account in the sub-account management tab and make any necessary changes.
Changing device licenses / Plugins
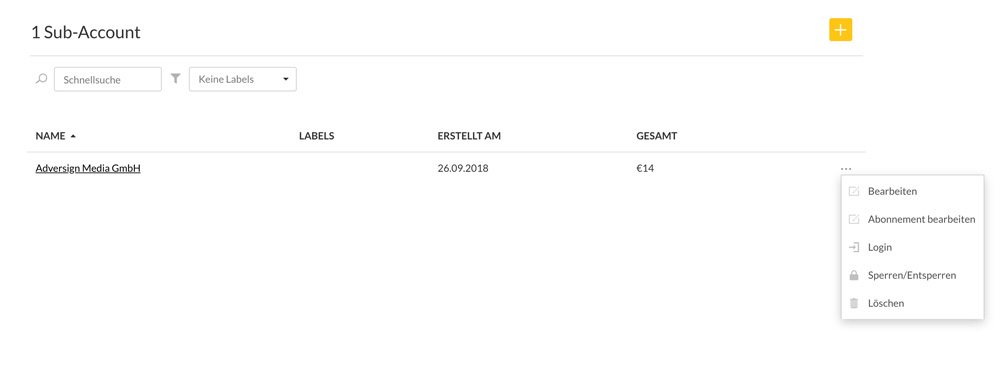
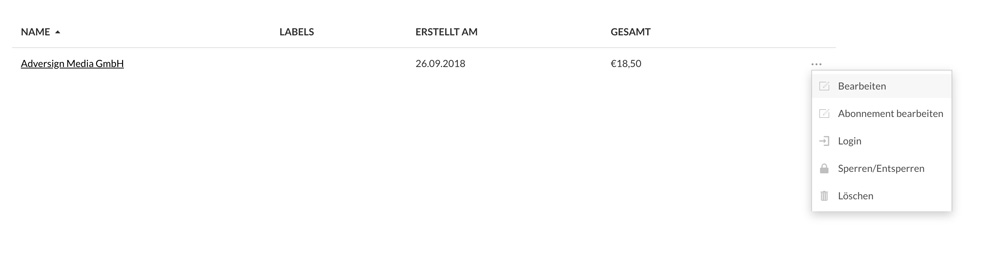
Once you have created a sub-account, you will still be able to add/remove device licenses and Plugins by following these steps. Click on the Options button (the button with three horizontal circles) of the corresponding sub-account and select "Edit subscription".
In the pop-up window, you can add new Plugins on the left-side or remove unneeded Plugins. In order to add/remove device licenses to your sub-account, you will need to change the value of the "Number" under "Device License".
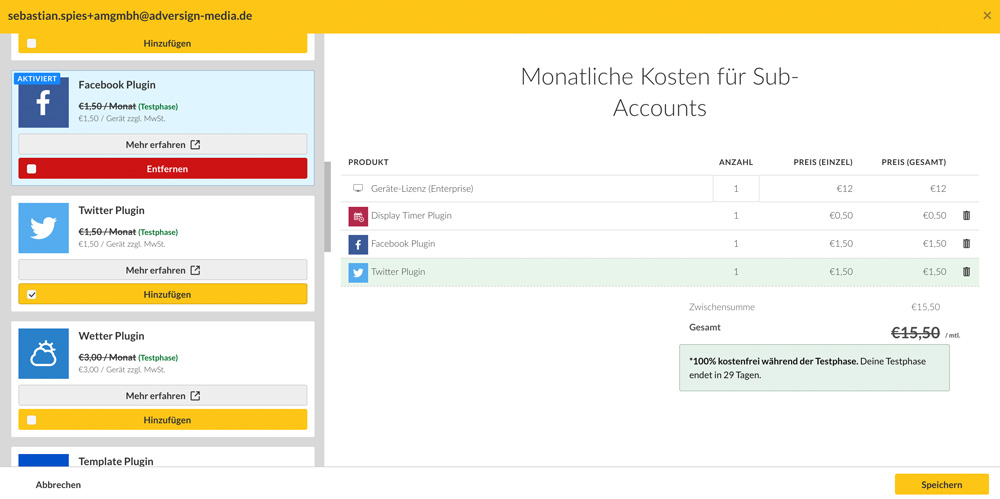
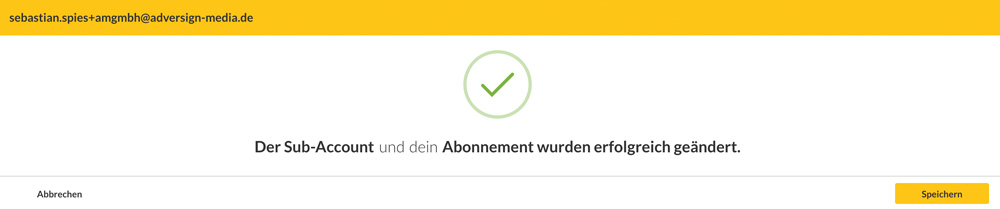
Once your changes are complete, please click on the "Save" button.
Delete a sub-account
In order to delete a sub-account, you need to click on the Options button (the button with three horizontal circles) of the corresponding sub-account and then select "Delete". You will have the opportunity to confirm that you want to delect this account. This will delete all related data (devices, playlists, media files) associated with this account.
Block a sub-account
If you have a sub-account that you want to temporarily lock (for example, a missed payment), you can take the following steps. Click on the Options button of the corresponding sub-account and select "Lock/Unlock". Once this is activated, it will no longer be possible to log-into the sub-account. Repeating the action will unlock the account.
Labelling a sub-account
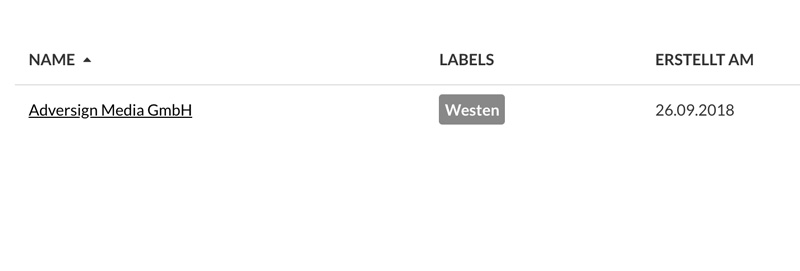
You have the option to categorize sub-accounts with labels. By grouping sub-accounts, you can share a playlist with all sub-accounts associated with a specific label. This will allow all sub-accounts with the same label to access the shared playlist. Additionally, you can filter in the sub-account management for specific labels and organize your sub-accounts easier.
To define the labels associated with a sub-account, click on the options button of the sub-account and select "Edit".
 Now click in the box below "Labels" and choose from an existing label. Alternatively you can also create a new label by typing in the box and then pressing "Enter" on your keyboard.
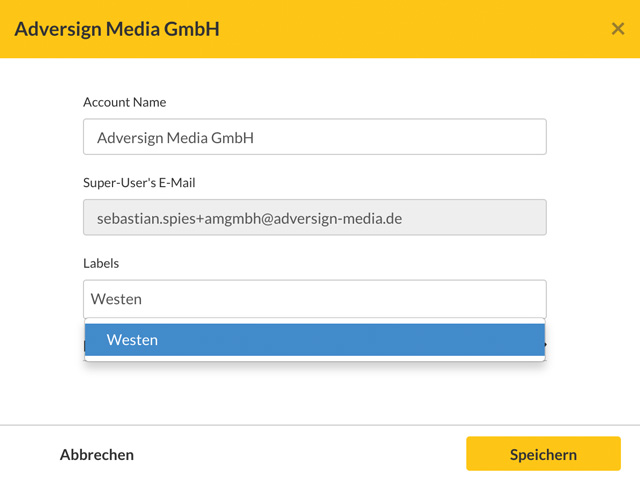
 After you have defined all desired labels for the sub-account, press the "Save" button. The new labels will then be displayed in the list for the sub-account.